Tuesday, September 3, 2013

Mobile Nail tech case

I love to do nails, unfortunately I do have to travel sometimes to do them. I had a small train case that held most of my supplies, apart from the uv lamp and polishes.

I have a huge collection of polish, it was a huge pain in the ass to drag around with me.


This is what the old case looked like


My mother was kind enough to find me this rolling tool box for my supplies, it's funny, the rolling tool box for my hair stuff is smaller.


I was really impressed with the room it had!

ALL of my polishes fit in the top tool box section!
This also included all of my gel polishes as well!!!!


The only downside is that the drawers don't have very much separation.
Because of that I got inventive and made some boxes out of a cardboard box and contact paper.


All the tools are in order of use.

My nail art drawer, separated by nail files.


And the bottom drawer is big supplies, and other misc stuff.


The bottom section, holds my nail lamp, paper towels, sculpting gel case, pedicure mask, and the pumps for acetone and rubbing alcohol.


Now I can ramble around the country side doing nails in relative ease!


Thanks for stopping by!

W


Friday, August 30, 2013

Bathroom remodel!

We had our bathroom redone! We did have a contractor do it, it was much cheaper in the long run just to have a pro do it!

So, here is the Before!


I know you are insanely jealous of it....

I was not impressed by the mold though.

It was not a pretty sight, so here are the major photos:


And the AFTER!

I chose to go with kitchen cabinets for the vanity because my hubby and I are so tall.


This is a deep soaking tub, so I can actually take a bath!


I absolutely adore my mirrors!!!


Lulu approves of the sink.


I made some custom towels as well, it really helps pull it together.


The two adventurist cats really enjoyed it right away, the other cat is now enjoying it a few weeks later!


Thanks for stopping by!

W


Sunday, August 25, 2013

Fall decor & wreaths

My sister and mother's favorite season is fall, 
and it also happens that both of their birthdays are in the fall.

So after being told they didn't want anything for their birthdays I came up with the perfect solution,
make them something.

What don't they have though?

Wreaths, I wanted to make myself one, so how hard was it to make two more?

After a trip to Hobby lobby with both of the recipients, I had everything I needed.


My sister picked out a grapevine wreath form, flowers and I chose the mesh.


My wreath making tactics goes as follows;
wrap wreath with mesh, glue stuff on, and DONE!
There was no rhyme or reason.

For my mother I made my first mesh wreath,

I simply used the mesh, ribbon and flowers. I admit I should have used wider mesh!

After seeing my mom's, My sister decided she liked they way it looked, so I made her one too!

I ran out of mesh on hers so it became very thin, once again I will use the wider mesh next time!

Finally I made myself a wreath of the left over decorations;

Mine is more simple with burlap and the scraps of mesh and ribbon.

I ended up with left over flowers and decor,
Just enough to make a centerpiece and to decorate a vase for my mother's entry way!
(Funny how it works out some times!)

the centerpiece, I used an old vase from her cabinet;

And her entry way vase,


Just now all I have to worry about is making them birthday cards!

Now if everyone could be this easy to craft for!

Thanks for stopping by!

W


Friday, August 9, 2013

DIY WASHI TAPE!

Hard to believe that you can make your own washi tape!
Those buggers are so expensive that I've started looking into alternative methods.
After browsing Deviantart.com 
I've come across some of the most beautiful designs by Harper Finch Design!
I knew that the front image for the folder would work perfectly for some 1" tape.
It just so happens that making tape comes in 1"!
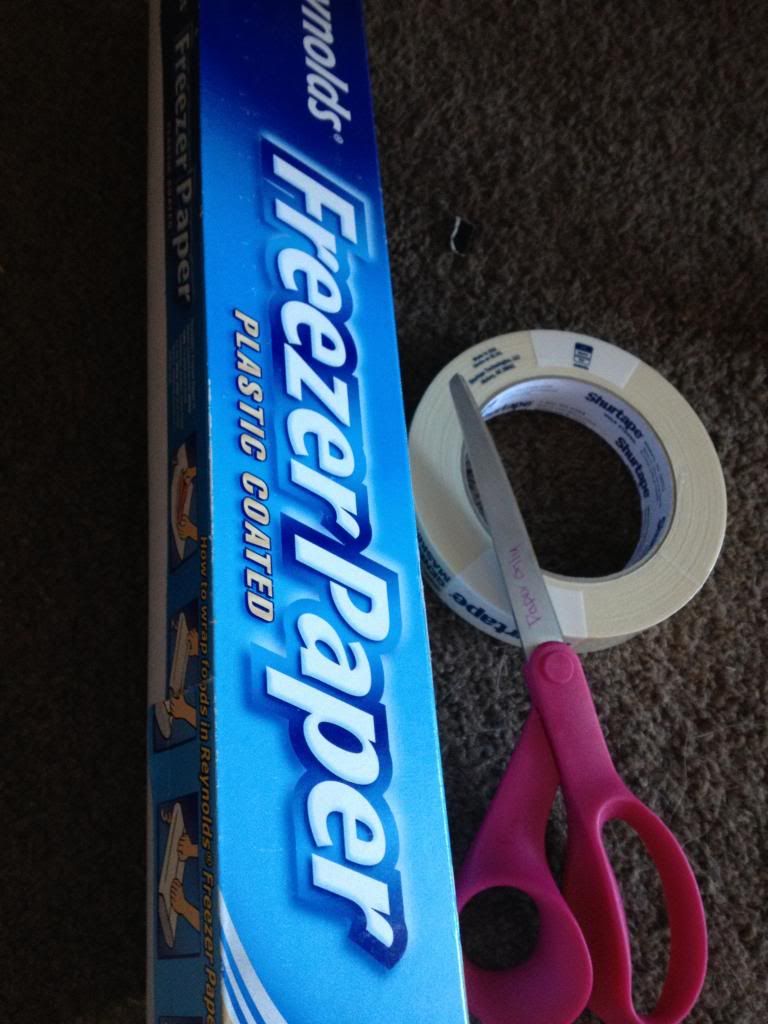
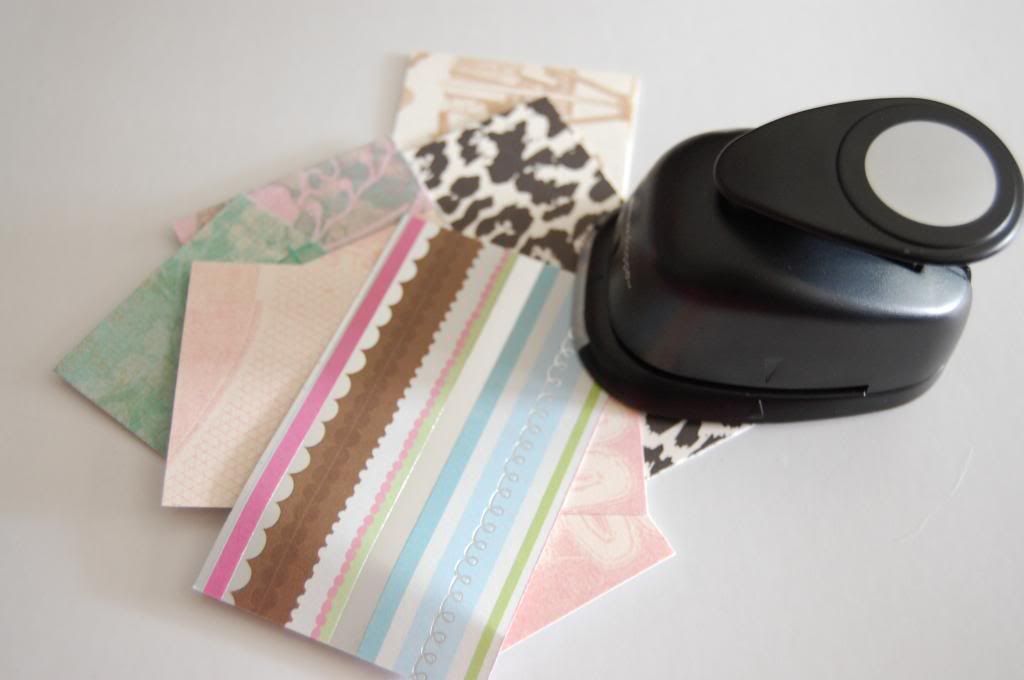
So one trip to Lowes later I had everything I needed to make my own tape.
With these three basic supplies you can make your own tape!
As long as you have a printer and a way to print photos you are good to go!

I had the freezer paper for making stencils, to lay down under my resin projects, etc.
The Masking tape was $1.77, they also have other sizes.

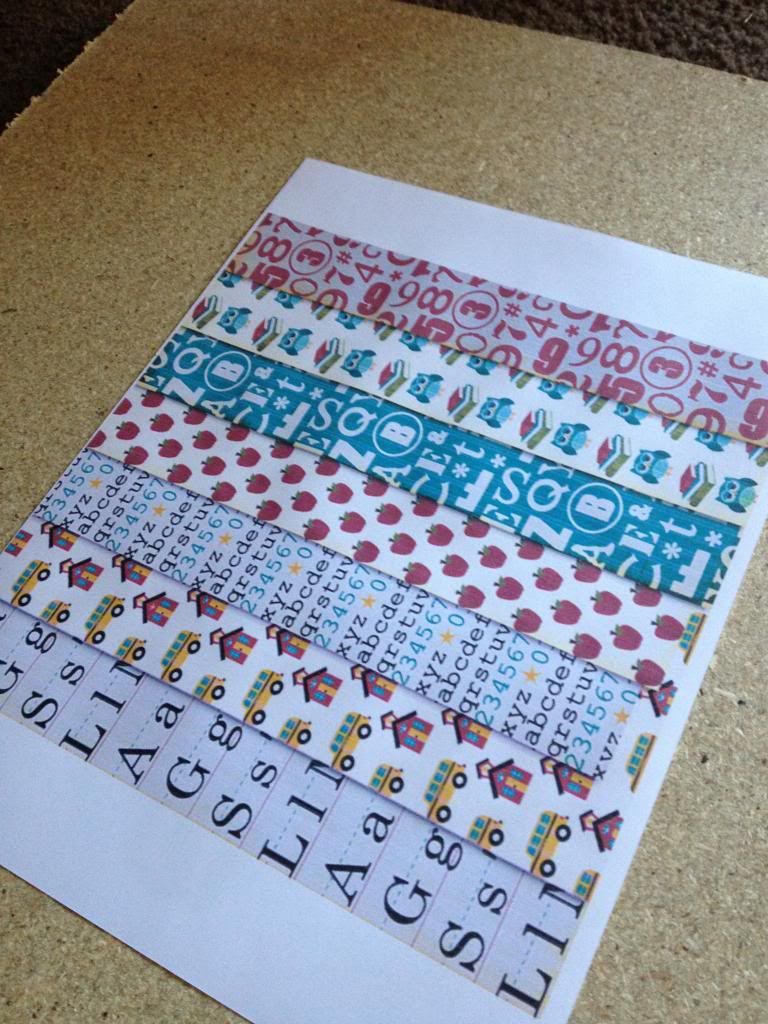
First what you have to do is find the designs you want on your tape:
They also has a very extensive etsy store here!

I chose to go with the School's Back Pattern 2,
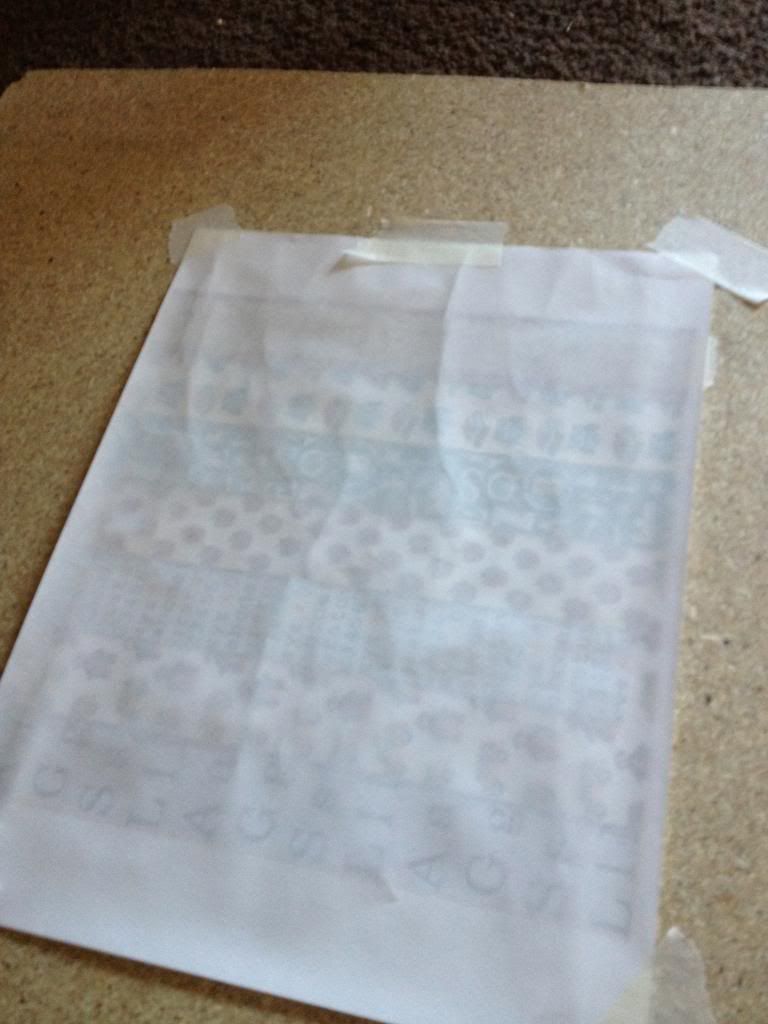
 I printed out a test page to check the placement 
I knew that the tape would not come off of the paper,
this is where the freezer paper comes in,
Simply cut the freezer paper to 8.5"x 11" 


Tape the freezer paper over the test page, plastic side up (the shiny side)


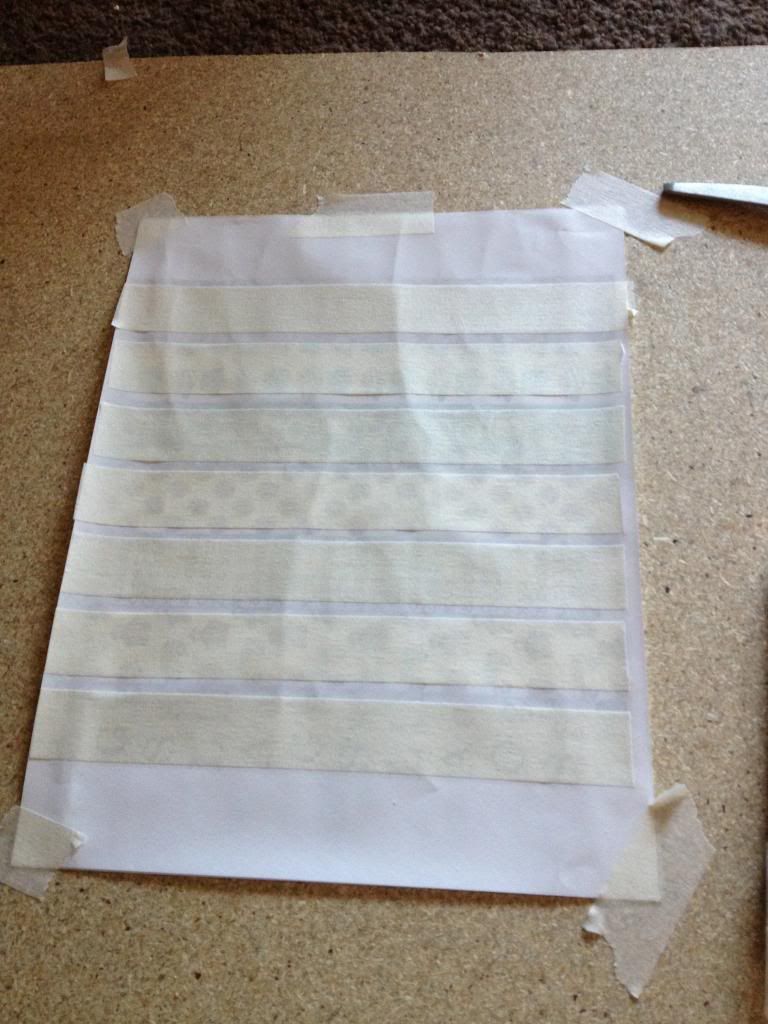
Now is the fun Part!
Place the tape over the area you want to be printed on the tape!

And send the freezer paper through the printer!


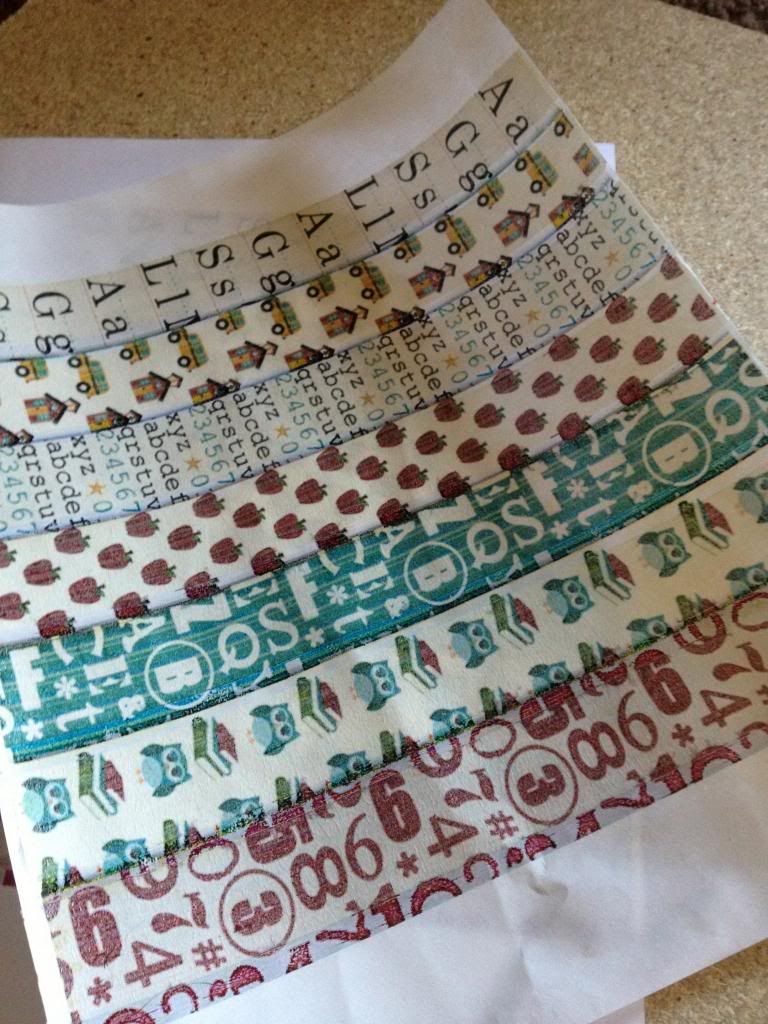
This ladies and gentlemen is how it prints out!
The only down side is that you will have to wait for the ink to dry, 
I left mine for 2 hours and it still smeared!
I would give it a few days if you can!

Now all you have to do is use the tape, it peels right off the freezer paper. 


It will curl into a spiral though so don't be surprised!

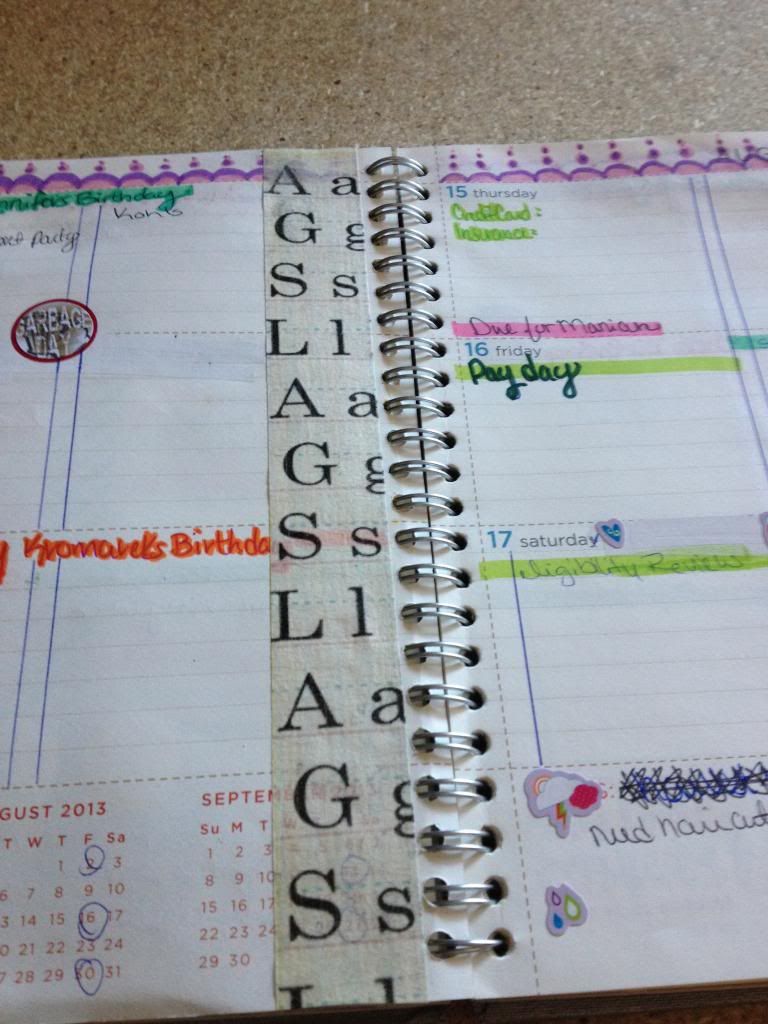
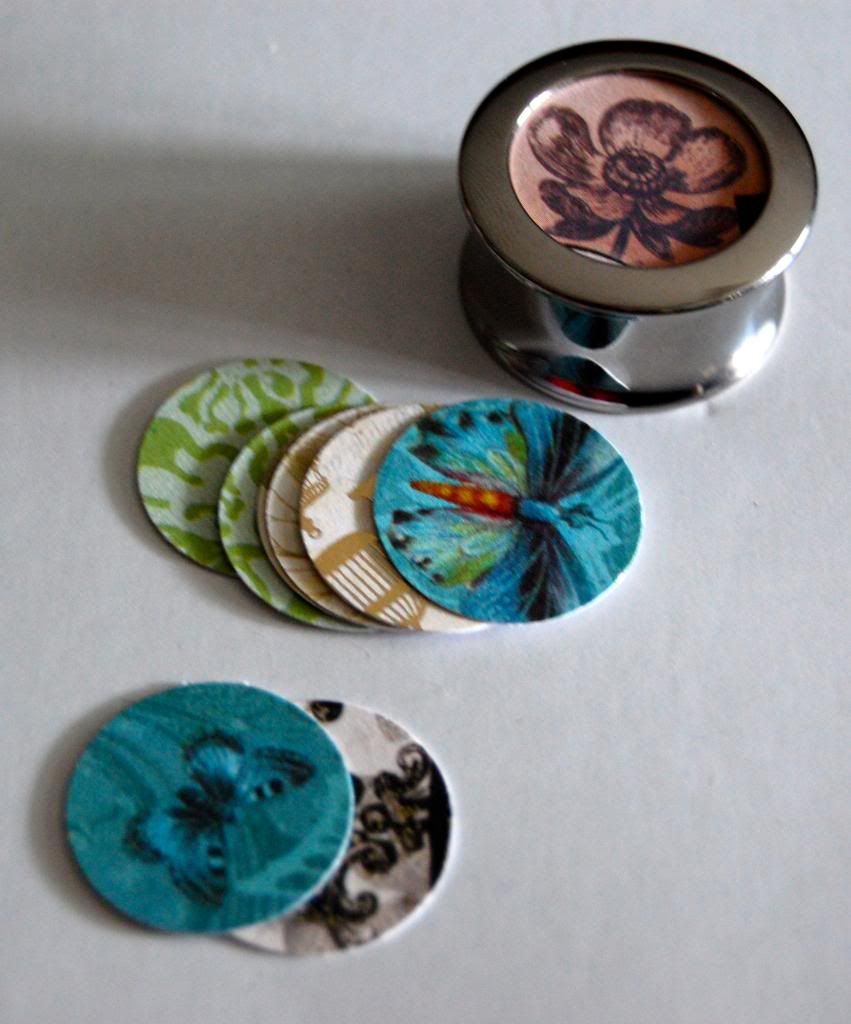
I even made a set of A Touch of Edge Patterns!


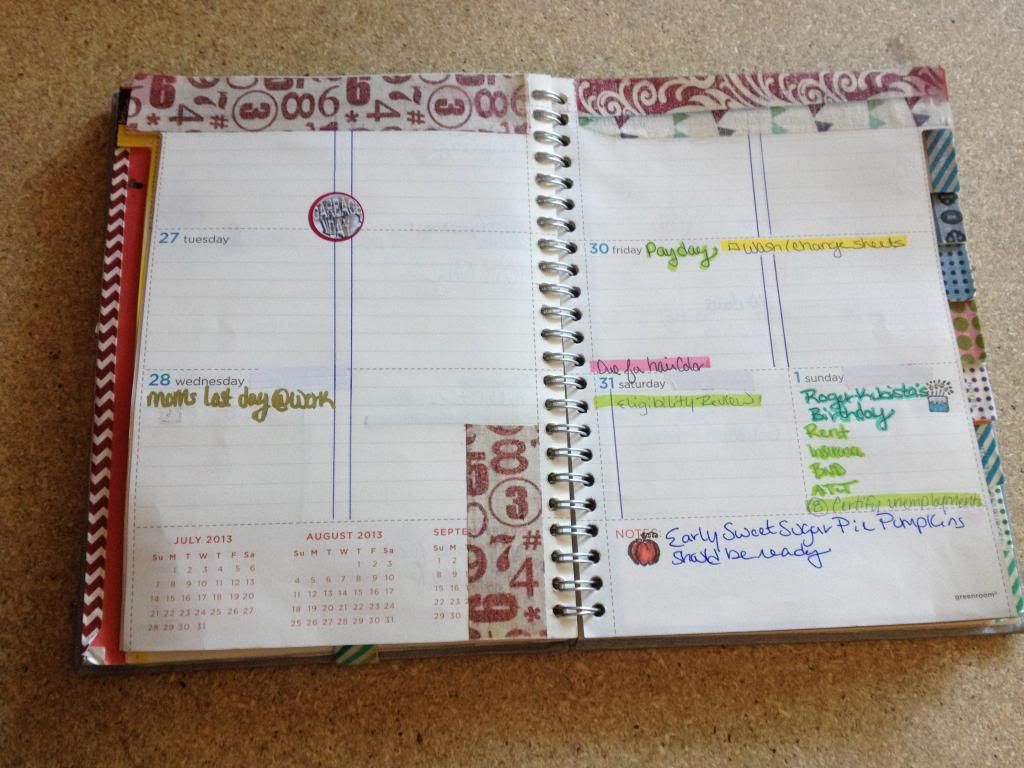
Look how awesome it looks in my planner!


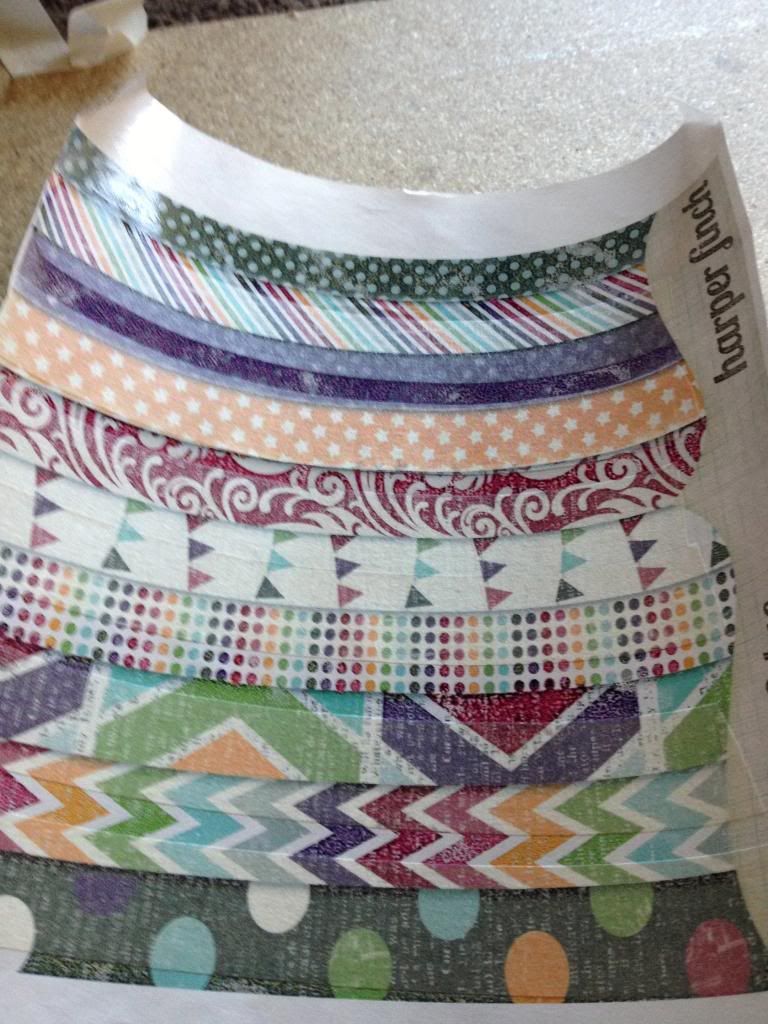
I only used the 'folder' Image for these but you could print a whole page 
of the papers that are included in the pack!
 Simply line the whole freezer paper with tape and print!

Imagine all of the possibilities!
With Harper Finch Designs there are tons of seasonal options as well, so go nuts!

Now you never have to buy washi tape again!


A Special Thanks to Harper Finch Design for allowing me to use their designs!

Thanks for stopping by!

W


Thursday, August 8, 2013

Fall Decor

I know that it's early to decorate for fall.
But we are having our bathroom redone and the house is a mess.

Decorating really cheers me up, so I found the fall decor and got to work!

I even made a starburst mirror out of book pages!
(I know that everyone had done it, and I had some empty area)

I simply switched out my flowers from spring to fall!
Easiest decorating ever.

I just threw some foliage in the cake stand and put choke cherry branches in the vase
(the branches are from my parents back yard!)

This arrangement I had already done and was hanging out in the box!

The TV also got some decor, The runner I made a few years ago.

The book cases of course got new foliage.


I did make a fall door sign as well!
I used the cricut mini and contact paper.


All ready for fall, when ever it arrives!

Thanks for stopping by!

W


Wednesday, August 7, 2013

DIY interchangeable plugs!

I love making jewelry, the only down side is that I don't wear normal earrings, so 
I always see cute earrings that I can't wear!

Until one day I came across some interesting plugs from a place called Industrial Strength, I ordered them and had a brilliant epiphany, you can CHANGE the insert!
DUH, problem solved!

These are the plugs,
They are Stainless steel and come with a pair of wooden inserts that are held in by a ring.
GENIUS!

Now all I had to do was find a paper punch and the paper I wanted to use!
I was in luck and found this punch on clearance at Hobby Lobby.

It was also the exact size I needed at 7/8"

With all of my paper scraps I had plenty of choices to punch out!

With all the paper punched, they look like this!


They slip right in over the wood!

now I have plenty of variety to mach my wardrobe without spending at least $35+ a pair of plugs!

Thanks so much for stopping by!

W


Monday, July 22, 2013

Color coding stickers DIY

I have been relatively busy with our bathroom remodel and I'm sorry that I haven't been posting more.

But I do have an very easy DIY for you today!

I am in love with these color coded stickers

The only problem is, do they HAVE to be neon colored?
I'm also more than halfway through a planner and it's hard to switch colors now.

What ever shall I do?

I grabbed these guys I had hanging around my craft room,

Sadly they are write only so I can't really stick them through my printer.
(they un-peel and stick to the inside, so when it says "write only" they aren't joking)
so next choice...

MARKERS!
I used the colors I'm using for color coding right now so that they would match!


The next thing I did was added some simple stampings to them!

how super cute are these guys?!?!

Simple yet effective!

Thanks for stopping by!

W